Lemon Ginger Honey Elixir

Perfect on chilly days to warm the soul. This elixir helps to ease the side efficts of a cold or sore throat. 


4-5 fresh lemons, juiced
3/4 cup cold water
3-4 inch piece ginger, peeled and cut into thin medallions
2-3 Tbsp raw honey (or to taste)
optional add-ins turmeric + black pepper, cinnamon, fresh garlic

  1. Add lemon juice, water and ginger to a small pot. Bring up to just a boil, turn off heat and allow to steep 4-5 minutes.
  2. In a clean glass jar, add honey and top with honey/ginger mixture. 
  3. Add 2-3 oz or to taste to your favorite mug and top with cold water.
  4. Store elixir in the refridgerator and use within a few days.


Read more →

Kimchi Fried Rice

Kimchi Fried Rice

2 cup jasmine rice, cooked

½ cup kimchi, roughly chopped

¼ cup juice from kimchi

3 Green onion

2 Tbsp  Kikkoman Soy sauce 

2 Tbsp Shaoxing Cooking wine (optional)

1 Tbsp sugar

2 tsp rice wine vinegar

1 Tbsp Sesame oil

2 Tbsp Sesame seeds

2 tsp doenjang (substitute with 1  Tbsp of miso)

2 eggs, beaten (optional)


  1. Whisk together soy sauce, sugar, vinegar and sesame oil and doenjang and Shoaxing Cooking wine, if using. Set aside.
  2. Preheat a wok or frying pan. Add 2-3 Tbsp neutral oil along with cooked/cold rice. Stir-fry to coat evenly in the oil. Push rice aside and stir-fry eggs if using. Once cooked combine with rice. Push aside once more and add chopped kimchi, stir-fry for 30 seconds, and combine with rice.
  3. Add the sauce that you set aside, along with the chopped white part of green onion. Garnish with onion greens and sesame seeds. 

Read more →

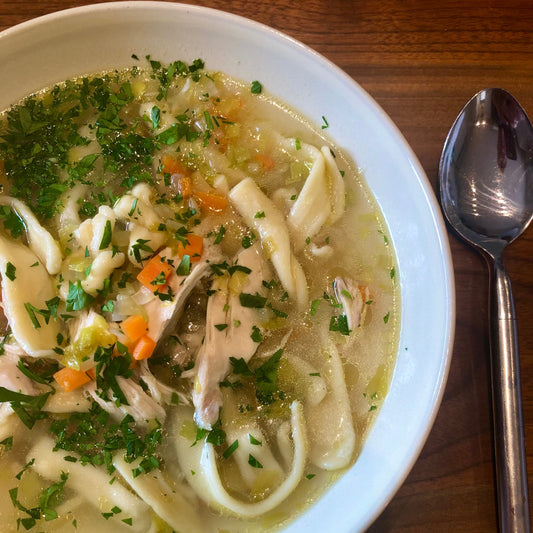
Chicken Noodle Soup

Chicken Noodle Soup!  

There are likely thousands, if not millions of different versions of chicken noodle soup in the world.   They differ based on how we learned to make the soup from whoever made it before us, perhaps making small changes along the way, as the times change.   This version comes straight from my (Kirstie’s) mom, who made it just like her mom.   Stay tuned for the ‘Jody’ version in another recipe, as they differ dramatically!   We’ve often had the ‘battle of the chicken soup’ pots going.  One is not better than the other, just different, and we can revel in the joy that each pot brings.  


This is a big batch recipe, because, why not.  It takes no more time and barely any more work to make a large batch than a small batch.  Absolutely nothing better than having a few containers of soup in your freezer, then all you have to do is cook some noodles, as you would never freeze or store the soup with the noodles in the broth.   And when it comes to noodles, that’s a whole other story of preferences!  (We grew up on a ‘Lancia Medium brand.  Today I use a thin German egg noodle.).   


This recipe takes a few hours, yes, but your hands-on time is under 30 minutes.   So pick a rainy or chilly day, relax or fold laundry in between, and wait for the faces of joy to spark when Chicken Noodle Soup is for dinner.  

To learn the difference between stock & broth, click HERE.   

Makes: 5-6L
Prep Time: 20-30 minutes
Cook Time: 2-3 hours, plus the time it takes to boil the noodles

Recipe: 

For the Broth: 

2 whole chickens 
4-5 L (18-20 cups) of COLD water 
1 large onion, roughly chopped (some peel left on is fine, good for golden colour)
1 large carrot, peeled and roughly chopped
1-2 ribs of celery, roughly chopped
3 bay leaves
A handful of parsley stems (save the leaves for garnish) 
Some thyme springs, if you’ve got them

For the Soup: 

6-7 carrots, peeled and cut into batons/sticks (that’s how my Grandma cut them, you can cut them however you like)
2-3 ribs celery, diced 
1-2 cups chopped parsley, either in the soup or pass at the table 
Green Onions, chopped, for garnish at the table (optional)
Your favourite Noodle, boiled in a separate pot to package directions in salted water and drained
Kosher Salt, as needed 


  1. Make the broth: Place whole chickens in a large stockpot.  Cover with cold water and bring to the boil over high heat.   
  2. Once you see movement in the pot, the grey scum/foam should have risen to the top of the pot.  Remove with a ladle and discard. This is excess calcium/impurities from the bones.   
  3. Reduce heat to low and add in roughly chopped onion, carrot, celery, bay leaves, parsley stems and thyme, if using.  Add in 1 tablespoon of salt.  
  4. Cook over low heat until the chicken is very tender, approximately 2 hours.  Generally the legs will be very loose and can easily pull away from the body of the chicken.   
  5. Once chicken is tender, use a large spider or a pair of tongs and a spoon to carefully remove the chickens to a large bowl to cool.   Use a slotted spoon to remove the vegetables.  Discard vegetables.  
  6. Generally I will ladle out about 1L (4 cups) of the broth and set aside, so that my ratio of broth to meat, vegetables and noodles is correct.  You can always add this broth back in.  
  7. To the remaining broth add in the fresh carrots and celery.  You can now also taste the broth and season with salt.   Cook over medium-low heat until carrots are tender.   
  8. Meanwhile, remove the chicken meat from the bones. Tear or cut into large pieces (too small and the meat becomes too ‘shredded’ too quickly).   Discard the carcass and the skin (we’ve extracted all of the flavour from it).  
  9. Once carrots are tender carefully add all of the meat and heat through over medium-low heat.  Do not allow soup to boil.  
  10. At this point you can add the parsley to the soup, or pass it at the table.  
  11. Cook your noodles, drain and add to bowls.  Top with the soup and garnish as you like with more parsley, green onion and freshly ground black pepper.  
  12. To freeze leftovers: ladle into 2 or 4 cup containers, leaving about 1” headspace.  Let cool slightly before refrigerating overnight.  Then you can freeze for up to 6 months.   Pop frozen soup out of the containers into a pot and re-heat slowly until very hot.   

Learn to make our other favourite one-pot chicken meal with us!   Join our Chicken & Dumplings Online Cooking Class for entertaining step-by-step video instruction!   

Read more →

The Best Roasted Tomato Bisque Recipe

Rich Creamy & Comforting! Tomato Bisque is perfect with in-season tomato or your favourite can of good quality tomato during long cold winter months. 

Tomato bisque is a timeless classic, combining the rich, tangy flavour of ripe tomatoes with the creamy, velvety texture that makes each spoonful a comforting delight. This dish is perfect for showcasing the deep, natural sweetness of tomatoes, especially when they’re at their peak. Whether served as a starter or a main course, tomato bisque is a warm, satisfying option that brings together the best of summer’s bounty and the cozy, comforting vibes of a homemade soup. Ideal for any time of year but especially inviting as the weather starts to cool, this bisque is a testament to the simplicity and elegance of fresh ingredients.

We love the addition of bacon to add a smokiness to the background of this delicious bowl of soup. 

Tomato bisque pairs beautifully with a variety of classic accompaniments that enhance its rich, creamy flavour. Here are some classic combinations to serve with tomato bisque:

  1. Grilled Cheese Sandwich
    The ultimate pairing, a grilled cheese sandwich with melty, gooey cheese and crispy, buttery bread complements the smoothness of the bisque perfectly.

  2. Crusty Bread:
    A slice of warm, crusty baguette or artisan bread is perfect for dipping into the bisque, soaking up every bit of its deliciousness.

  3. Garlic Bread:
    The rich, buttery, and slightly garlicky flavors of garlic bread add a savoury contrast to the bisque, making each bite more indulgent.

  4. Caesar Salad:
    A crisp Caesar salad with romaine lettuce, Parmesan cheese, and croutons provides a refreshing, crunchy counterpoint to the creamy bisque.

  5. Herbed Croutons:
    Adding herbed croutons on top of the bisque brings a crunchy texture and a burst of flavour, enhancing each spoonful.

  6. Cheese Quesadilla:
    A simple cheese quesadilla offers a cheesy, crispy bite that pairs well with the smooth texture of the bisque.

  7. Caprese Salad:
    A Caprese salad with fresh mozzarella, basil, and ripe tomatoes echoes the flavours of the bisque while adding a cool, fresh element to the meal.

  8. Avocado Toast:
    Creamy avocado toast topped with a sprinkle of sea salt and red pepper flakes makes for a tasty and healthy side to the bisque.

  9. Parmesan Crisps:
    Crispy Parmesan crisps add a salty, cheesy bite that enhances the bisque’s flavour without overpowering it.

  10. Simple Side Salad:
    A light, simple salad with mixed greens, vinaigrette, and seasonal veggies adds freshness and balance to the richness of the bisque.

These classic combinations provide a variety of textures and flavours that complement the smooth, rich nature of tomato bisque, making for a satisfying and well-rounded meal.

INGREDIENTS

1 large can whole tomatoes or about 2 lbs plum tomatoes

2 tbsp. butter
3 strips of bacon, diced
1/2 cooking onion, finely diced
½ carrot, finely diced
1 rib celery rib, finely  diced
1 clove garlic, minced
3 sprigs fresh flat-leaf parsley
3 sprigs fresh thyme
1/4 tsp. cayenne pepper
splash of brandy (or white wine)

 Kosher salt and freshly ground black pepper
2 ½  cups Stock, or Water, as needed
1/2 cup 35% cream

 DIRECTIONS

  1.  If using fresh tomatoes begin here (if using canned begin at step 5): heat oven to 425 degrees F
  2. Core and halve tomatoes (if using fresh)
  3. Toss with olive oil, salt and pepper
  4. Roast on a baking sheet for 25 minutes or until skins are slightly blackened; cool and slip off skins
  5. Meanwhile, heat a soup pot over medium heat. Add butter & fry bacon until browned but not too crispy. 
  6. Add onion and sweat for a couple of minutes until soft, but not browned. Follow with celery and carrot, cooking until soft.
  7. Add garlic and cook 30 seconds
  8. Add tomatoes (canned or roasted). Allow to cook until reduced and thickened. 
  9. Add herbs and spices, followed by wine or brandy. Boil for a few minutes. 
  10. Add water, as needed; simmer for 15 minutes
  11. Stir occasionally, breaking up tomatoes
  12. Finish by stirring in 35% cream and salt and pepper to taste


Read more →

Lemon Olive Oil Cake

Lemon Olive Oil Cake

3/4 cup olive oil
3 eggs separated
1 cup white sugar
1 tsp vanilla
1/2 cup lemon juice + lemon zest (2-3 lemons)
1 tsp kosher salt
1 tsp baking powder
1 tsp baking soda 
1 1/2 cup (150 g) almond flour
1/2 cup (65g) gluten free flour
1/2 cup full fat yogurt
1/4 cup whole milk

  1. Pre-heat grill/oven to 350F. 
  2. Line an 8-9" spring from pan: using small amount of butter or fat and grease the spring form pan. Measure of a round piece of parchment for the bottom on the pan and two strips of parchment for the sides of the pan
  3. Whisk together dry ingredients (almond flour, gf flour, baking soda, baking powder and salt. Set aside.
  4. Make a meringue: Separate eggs, whip eggs white until foamy (add 2 Tbsp of the measured amount of sugar to the eggs) continue to whip to medium firm peaks. The egg white/ meringue will be bright white and shiny.
  5. In a large bowl mix together the olive oil, egg yolks, the remainder of the sugar (1 cup minus 2 Tbsp that you add to the eggs whites) and vanilla. Whisk until you have an homogenous mixture and the sugar is dissolved.
  6. In a separate small bowl mix together the yogurt and the milk until throughly combined.
  7. At this point you should have 4 bowls: dry ingredients, olive oil mixture, whipped eggs whites/meringue and yogurt-milk mixture.
  8. Using a large spatula: fold the first half of the dry ingredients into the olive oil mixture, fold in the the yogurt mixture, followed by the remainder of the dry ingredients. Finish by folding in the meringue. 
  9. Pour batter into the greased & parchment lined spring form pan. 
  10. Bake for 50m minutes- 1 hour until a tooth pick inserted comes out clean. Thermometer will read 190F

Read more →

Olivieri Gnocchi Carbonara

Olivieri Gnocchi Carbonara

Serves: 2 people
Prep time: 5 minutes 
Cook Time: 10-12 minutes

We've combined two of our favourite things in one recipe: Potato gnocchi & pasta carbonara! Grab a package of Olivieri Fresh Potato Gnocchi and in about 10 minutes you can have a gourmet dinner for two!   

Traditionally pasta alla carbonara combines guanciale, egg yolks & parmesan and/or pecorino cheese together with spaghetti.  We've swapped the spaghetti for this quick cooking gnocchi, and we're using local bacon.   Be sure to use that valuable cooking liquid to create a creamy sauce.  

Recipe: 

4 slices bacon, diced
3 tbsp. olive oil 
2 egg yolks
1/2 cup grated Grana Padano Cheese 
Plenty of freshly ground black pepper 
1-350g package of Olivieri Fresh Potato Gnocchi 
Kosher salt, as needed 

  1. Bring a medium-sized pot of water up to the boil, about 5 cups.  
  2. Meanwhile, fry bacon with olive oil over medium heat, just until crisp.  Keep on very low heat.   
  3. In a heat-proof bowl, whisk egg yolks until combined, then whisk in about 1/3 cup of the parmesan cheese.  Season with a good pinch of salt and freshly ground black pepper.  
  4. Season water with salt, until pleasantly salty (about 2 tbsp.).   Add in gnocchi, give a stir, and return to the boil.   Cook gnocchi for 2-3 minutes only, checking for doneness once they float.  
  5. Before draining, SLOWLY whisk about 1/2 cup of gnocchi cooking liquid into the egg/cheese mixture. 
  6. Drain gnocchi or use a spider to add gnocchi to the bacon pan.   
  7. Scrape gnocchi-bacon mixture into the egg/cheese mixture, stirring well to create a sauce.  
  8. Divide amongst two warm bowls and serve with more black pepper and remaining parmesan cheese.  

Read more →

Butter Beans with Feta & Dill

Butter Beans with Feta & Dill 

Serves: 4 people
Prep time: 5 minutes 
Cook Time: 10-12 minutes

With an effort to add more beans into our lives (perhaps after watching a few episodes of Live to 100: Secrets of the Blue Zones! ) we created this recipe using large & creamy Butter Beans!  With their mild & creamy flavour and high protein content, we didn't need too much more to make this a delicious light lunch, side dish or even a substantial dinner on a hot day with some crusty bread.  

We used 2 cans of Organic Butter Beans, enough for 4 decent servings.  For the tomato, a combination of both Concentrated Tomato Paste and fresh tomatoes made for a sauce with a really good amount of umami.   If you don't have fresh, ripe tomatoes, good quality canned tomatoes will be perfect (we love this brand!) 

Finished with some baby spinach, fresh dill and feta cheese, this dish has definitely become a part of our regular recipe roster! 

Recipe: 

1/4 cup good quality olive oil
1 small onion, finely diced
1-2 cloves garlic, finely sliced or chopped 
pinch of chili flakes 
2 tbsp. tomato paste 
2 cups crushed or freshly grated tomatoes
A good handful or two of baby spinach 
2 cans Butter Beans, rinsed and drained well
A handful of fresh dill, finely chopped
1/2 cup or so of crumbled feta cheese (as much as you love!) 
Kosher salt, as needed 
Extra olive oil, for serving

  1. Preheat a large frying pan/skillet over medium heat. 
  2. Add olive oil, followed by the onion.  Season with salt and fry until golden. 
  3. Add garlic and chilies and fry for 1 minute. 
  4. Stir in tomato paste, distributing it well and fry until deep in colour.  
  5. Add in crushed tomatoes.  Simmer, still over medium heat, until reduced and thickened, 3-4 minutes.  
  6. Stir in spinach and beans.  Simmer for 3-4 minutes. 
  7. Off the heat, stir in dill, reserving a little to sprinkle on just before serving.  
  8. Divided amongst warm bowls and garnish with feta cheese, a sprinkle more dill and drizzled with olive oil.  


If this recipe is your thing, check out our Greek Feta Bake Class!  

Read more →

Mixed Bean Salad

We love the freshness the leaves of the celery bring to this, as well as the flavour-enhancing celery salt!  Equal parts vinegar & oil ensure that the beans really soak up all of the flavour. 

2 cans of mixed medley beans, drained and rinsed well 
2 green onions, finely chopped 
2 ribs of celery, including some leaves, finely chopped 
1 tsp. sea salt 
1 tsp. celery salt 
1/4 cup good quality red wine vinegar 
1/4 cup olive oil 

  1. Simply mix everything together well in a bowl. 
  2. Keeps well, refrigerated for 3-4 days.  

Read more →

Best Ever Potato Salad

Best Ever Potato Salad  

Serves: 8 people, as a side dish 
Prep time: 10-15 minutes 
Cook Time: 30 min + 9 minutes
Rest Time: 30 minutes
Make Ahead: Up to 2 Days 

With all of the potato salad recipes out there do we really need another one?  Us included, we had our recipe down pat.  Made it every year, and it is delicious.  Then, with a few careful tweaks and drawing on a technique used in other potato recipes: we have updated the classic we know and love for the better. 

Seven steps to better potato salad: 

  • Choose your potato wisely: Make sure it is not too old, and not too starchy.   If you can get your hands on the rare yet coveted Huckleberry Gold, this is our latest favourite.  A good quality yellow fleshed potato is perfect as well. 
  • Peel the potatoes completely (skins in potato salad tend to fall of and give a papery texture). 
  • Cut potatoes into a large dice to cook.  This is definitely a change-up from our former ways, where leaving them whole was our preference.  Read on for more! 
  • Once you've added your peeled & diced potatoes to your pot, cover with COLD water (always--ensures an evenly cooked potato) and then add 2-3 tablespoons of VINEGAR to the water.  This technique keeps the shape of the potato, keeps too much dressing from absorbing, and extends the shelf life of the salad.  NOTE: it does increase your cooking time. 
  • SALT your potatoes well!  With enough salt at the beginning you flavour the potatoes from the inside out, leaving only minimal seasoning to the end. 
  • Once your potatoes are fork tender, LIFT them out of the water onto a baking sheet to cool just slightly before folding in with the dressing.  Straining them out into the sink leads to broken potatoes. 
  • Use that pickle juice!  We add a good amount of pickle juice to our dressing.  It makes it deceivingly and oh-so delicious.  


Recipe: 

2.5 lbs. potatoes, peeled & cut into 1 1/2 inch cubes 
2 tbsp. Diamond Crystal Kosher Salt (or more if water does not taste salty) 
3 tbsp. white vinegar 

6 large eggs 

4 green onions, finely sliced 
a good handful of finely chopped dill 
a small bunch of chives, finely chopped (optional) 
3 tbsp. capers, chopped if very large 
3 small dill pickles, chopped 
1 cup mayonnaise (we like Hellmann's or Duke's.  NOT 'salad dressing'). 
1/3 cup dill pickle juice 
Kosher salt and freshly ground black pepper, as needed 

  1. Place potatoes in a pot and cover with cold water.  Add salt and vinegar, bring up to the boil over high heat.  Let boil for one minute, then reduce heat to low.  Cook until fork tender: this will be a little deceiving at first, as the vinegar keeps the outside of the potato firm, and the potatoes will take a little longer than usual. 
  2. In the meantime hard-boil the eggs: bring a second medium pot of water up to the boil.   Carefully add in eggs and continue to boil over medium-high heat for 9 minutes.  Drain and cool under cold running water for a few minutes.  Peel.  
  3. Chop all ingredients and mix together with mayonnaise and pickle juice in a large bowl.  
  4. Once potatoes are fork tender, carefully drain and let cool for 5 minutes on a baking sheet.  They should still be warm when you toss everything together. 
  5. Fold potatoes into mayonnaise mixture.  Chop eggs into large pieces and add to the bowl, but season with salt and pepper first before folding in.  
  6. Taste for seasoning and refrigerate 30 minutes before serving, or up to 2 days.   

 Make Bacon from Scratch and Fall-off-the-Bone Ribs!  

Need more Summer Salad ideas?   Try our Summer Salads Cooking Class! Perfect for helping you cook for a cottage weekend away or your next BBQ, complete with a detailed shopping list, cooking guide & video instruction to help you make a lot of food in little time!  

Read more →

Citrus Sunshine Vinaigrette

Citrus Sunshine Vinaigrette 

Makes: 1 cup 
Prep Time: 3 minutes  

The colour alone of this bright & delicious dressing is enough to keep you coming back for more!  And this vinaigrette comes with some health bonuses! The spice combination of turmeric and black pepper is a natural inflammatory.  Good quality olive oil contains those HDL or cholesterol lowering benefits.  Apple cider vinegar is great for lowering blood glucose levels and lemon juice, amongst other things, is known as a great body detoxifier.   

This dressing tastes delicious on mixed green salads (try it with strawberries & goat's cheese!), drizzled over grilled or roasted vegetables (even grilled salmon!) and other simple, seasonal fresh vegetable salads such as asparagus with feta, green beans with almonds and of course your fresh garden lettuces.   

Our Citrus Sunshine Vinaigrette keeps well for 1 week refrigerated (bring to room temperature before using) but we doubt it will last that long!  

INGREDIENTS:  

Zest & Juice of 1 lemon 
3 tbsp. apple cider vinegar
¼ tsp. turmeric powder
¼ tsp. Ground black pepper 
1/2 tsp. sea salt 
1 tsp. Dijon 
1 tsp. Honey or maple syrup
½ cup neutral or olive oil 


  1. Place all ingredients except oil in a blender and blend on high until smooth, about 20 seconds.
  2. Scrape the jar of the blender, reduce speed, and then slowly drizzle in the oil. 
     

    Looking to up your salad game?

    Join our Summer Salads Cooking Class!   

Read more →